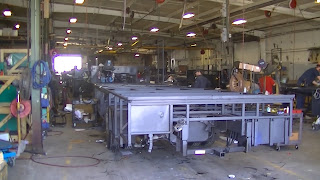
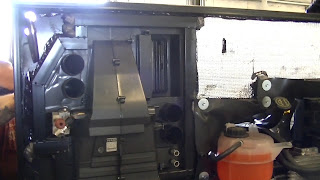
The above picture is our motor home to be from front. You can see the engine. The white in the picture is actually sliver insulation.
All throughout the frame, there are now bundles of wires in bags to protect them from when they sprayed the frame with rust proof coating. They really put this on thick in the welding shop.
This picture is looking forward from the back of the coach. You can see all the framing that was welded earlier. All the framing you see was originally silver but now has the rust coating all over it.
While we were outside looking over the unit, I went in search of a fellow owner's rig that was also being built. I was going to take some pics of it for him since he could not be here. I didn't find it and as I came out, our chassis was being moved into the second portion of the welding shop. Interestingly enough, they don't actually do any welding in this station and one of the workers saw us by the door taking pictures. He said we could come in and go around in that area as we wished since there was no welding going on there.
The above picture is our unit in the post-welding station. The workers are adding a lot more wires and heavy duty cables. The house batteries are added here.
The generator is on a small scissor lift cart. It is rolled to the correct position and slid off of the cart and bolted into position
While one guy was doing that, six others were doing all kinds of tasks. Above, one has just installed the dash heater and air system.
While another is routing some of the 110 volt cables under framing to wherever they need to go.
One thing that amazed me is the about of debris on the ground. It is like this all around the unit and for that matter at every station on all four production lines. I did ask about that, and was told that it was just from our coach and a prior one. They make it a point to sweep the floor at the end of the day so that they can start making the mess all over again.
Lunch for the workers begins at 11:15 and ends at noon. So when they completed all the tasks for the post-welding shop, the unit was moved over to what is called station 00 for the subfloor items. We went to lunch and came back early and the guys had already move the unit into position and begun work.
This station is currently outside. Not sure what they do if it is raining! The above picture shows the worker installing the built-in surge protector and transfer switch.
Next step is to install the fresh water tank. It looked so easy as long as the floor and sides were not installed. Bet this would be a major problem if it later leaked!
Another worker installed the black and grey water tanks.
They had to back the unit out of the way as it was facing another build that was completed and ready to go to the bubble shop for testing. Then they pulled it all the way into the factory to station 00.
This picture shows Carol as she stands for the first time on our subfloor. That's one small step for Carol, one giant step for our build!
This worked is installing the hot and cold pex water lines.
The floor is lifted by a small winch with clamps that go out to the side.
The subfloor already is pre-cut with all the holes needed for power, water, drains, etc. This is done at a station that has a computer saw. It is timed so that it is already waiting when the chassis arrives. As the winch lifts it, the workers push it into position, lining up the front part first.
As they were lowering the floor, they forget to put this gas line up through its hole in the floor. I ran over and snaked it up for them. I probably should have punched in on the time clock first though.
Once the floor is placed, it is screwed down with a zillion screws. Two guys went all around it screwing it down and bolting it all around the outside. Then they blow it clear of dust and begin spreading the adhesive for the floor.
When they have covered all areas that will be tiled with adhesive, they lay down a chalk line from front to back. Then they lay the tiles along this line so that they are precisely straight, front to back.
The floor is finished at this point. All wires, cables, pipes, etc. that need to come through the floor are in place.
The crew of four at this station have completed their tasks and one of them hops up on the temporary seat and backs the unit out and takes it over to station 01 for tomorrow. It is now time to sweep up the garbage and clock out.
And both Carol and I are worn out and we didn't even do the work!


1 comment:
Great pics Dave!
Post a Comment